io.github.EdonZo/talkthru
Talk while using your app — your coding agent gets each sentence aligned to the frame. Fully local.
talkthru
talkthru.dev · npm · @dr_edon · MIT
An automated feedback loop for any app. Screen-record your app on your phone and talk while you use it. Send it to your machine and your coding agent gets everything you said, attached to the screen you were looking at when you said it.
you:    *tapping through checkout* "this button is too small, I keep missing it"
                                  "and this error doesn't say what went wrong"

agent:  sees both screens, finds both components, fixes them.
Runs entirely on your machine. No accounts, no uploads, no API keys.
Works with a mac screen recording (⌘⇧5), an iPhone one over AirDrop, or Windows Game Bar. Any video with sound works — point the watcher at a folder.
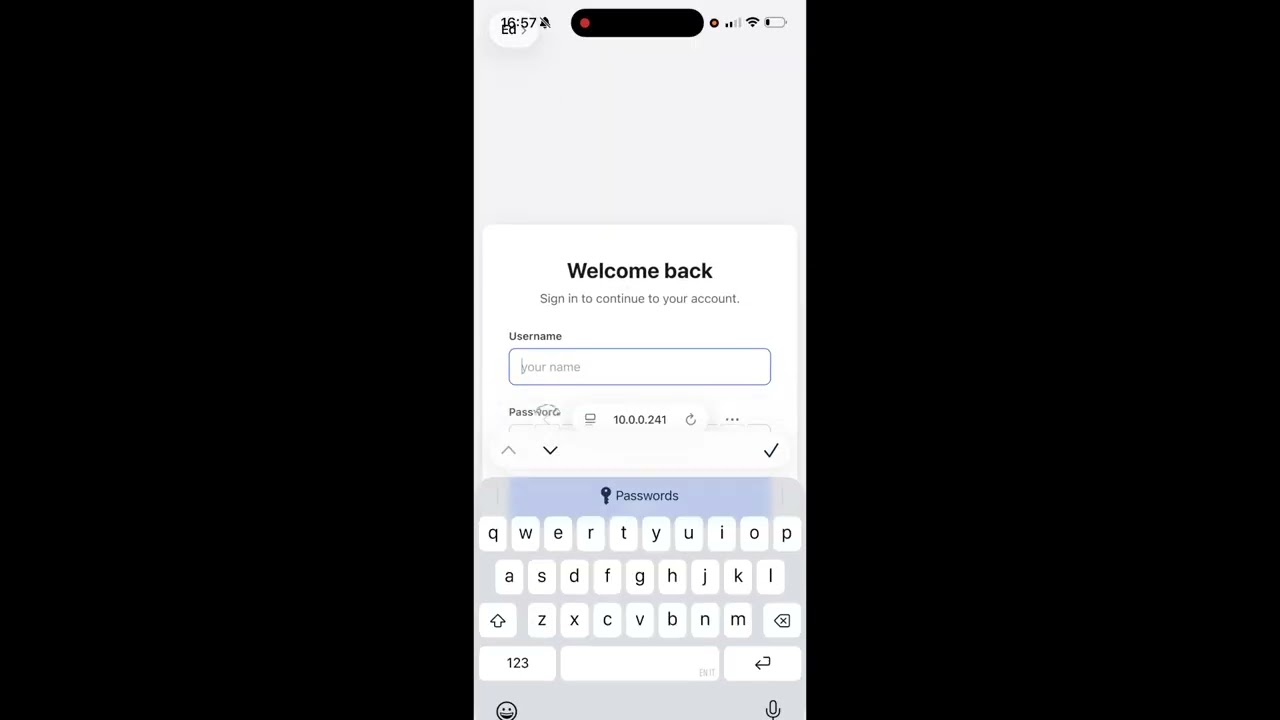
70-second demo — install, record, and the agent picking it up.
Install
npx talkthru doctor --fix
Pulls ffmpeg, whisper.cpp and the speech model. Nothing else to set up.
Start the watcher
npx talkthru watch
Leave it running. It only touches files named like a screen recording — the rest of your Downloads folder is invisible to it.
Connect your agent
talkthru is an MCP server, so any MCP client works — Cursor, Windsurf, Cline, Zed, Claude Desktop. Add it to your client's config:
{
  "mcpServers": {
    "talkthru": {
      "command": "npx",
      "args": ["talkthru-mcp"]
    }
  }
}
Claude Code has a one-liner for the same thing:
claude mcp add --scope user talkthru -- npx talkthru-mcp
Restart your client afterwards so it picks up the server.
Built and tested against Claude Code. Other MCP clients should work — tell me if yours doesn't.
Set up your mac
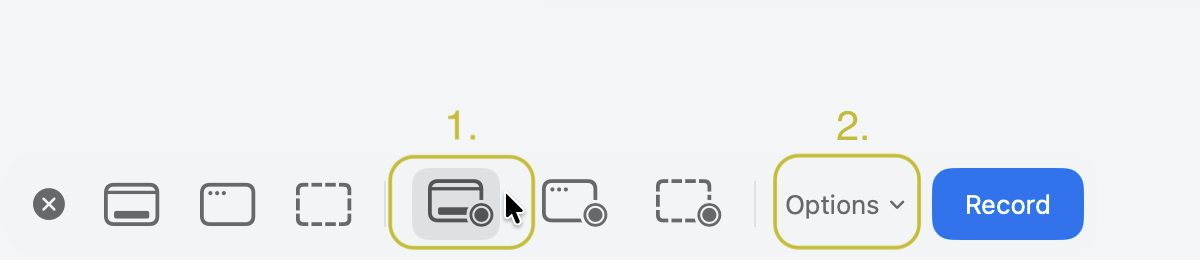
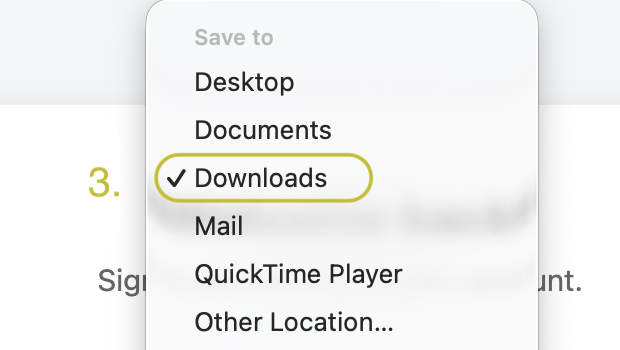
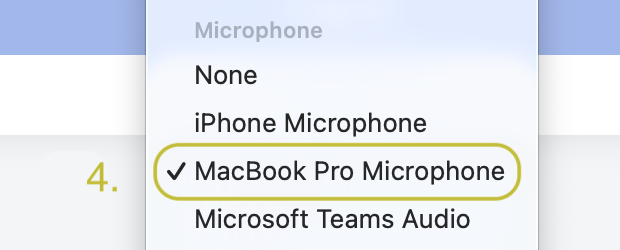
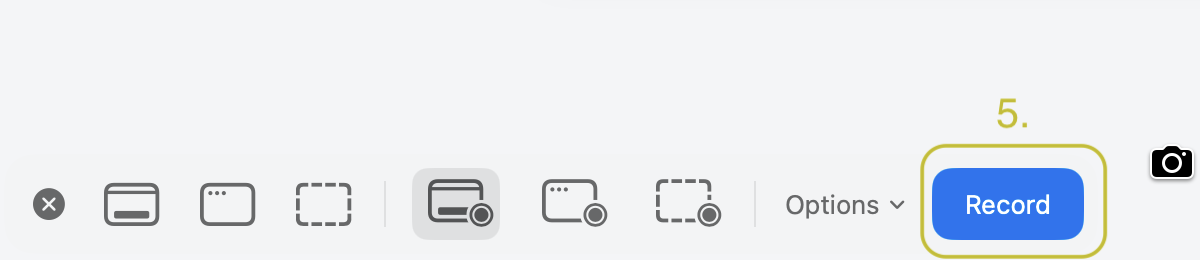
Once. Press ⌘⇧5, pick a record mode (the icons with the ◉ dot), then open Options and set Save to → Downloads and your Microphone. Both stick.
 |
|
| 1 · 2. press ⌘⇧5, pick a record mode, open Options | |
 |
 |
3. Save to → Downloads — the folder talkthru watch looks at |
4. pick your mic under Microphone |
 |
|
| 5. hit Record and talk as you use your app | |
No mic selected means a silent video and nothing to transcribe. Worth checking before your first recording.
Set up your phone
Optional — only if you want to record a phone app rather than your desktop.
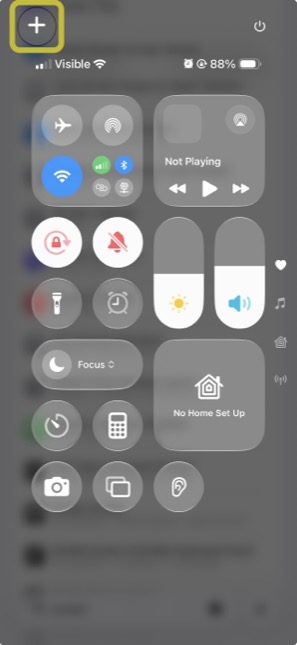
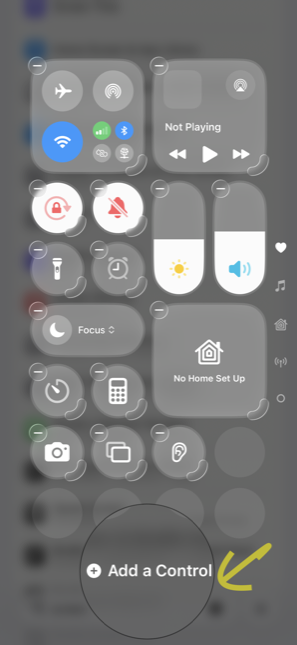
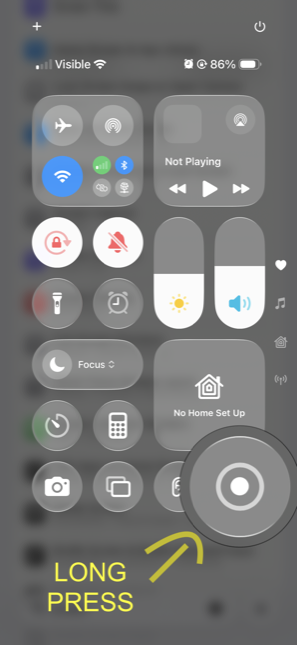
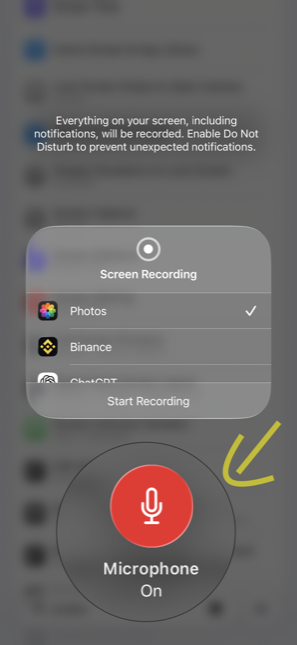
Once. Control Centre → + → Add a Control → Screen Recording. Then press and hold it and turn the microphone on.
 |
 |
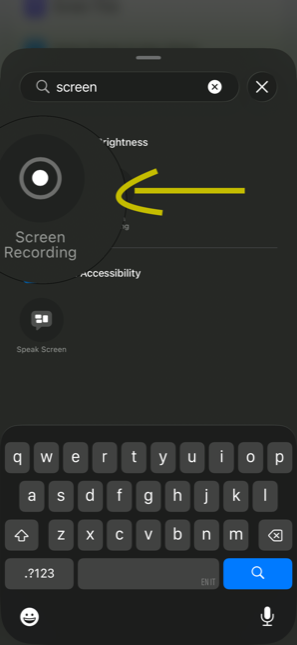 |
| 1. tap + | 2. Add a Control | 3. pick Screen Recording |
 |
 |
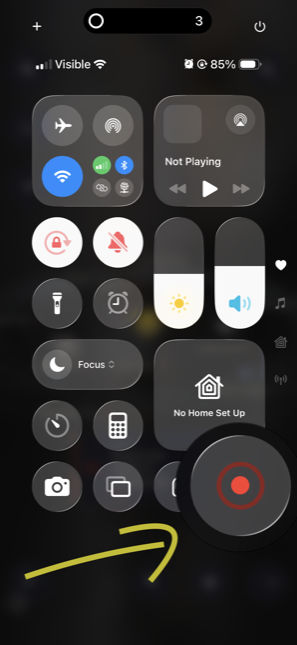 |
| 4. press and hold ◉ | 5. Microphone On | 6. tap ◉ and talk |
Recording a web app
Optional — a drop-in script that hands the agent the element you were pointing at, not just the picture of it.
<script src="/talkthru-dom.js"></script>
Record, then talkthru.stop() in the console downloads hierarchy.json. Process the two
together:
talkthru process ~/Downloads/screen-recording.mov --hierarchy ~/Downloads/hierarchy.json
The script and what it captures: clients/web.
Use it
- Record your app, talk as you go
- Get the video onto your machine (AirDrop is easiest)
- Ask your agent: "check the feedback in my last talkthru session and implement it"
Ready in about twenty seconds. Your original video is kept in ~/.talkthru/archive/.
Mute your app if it talks. Its narration lands in the transcript next to yours and whisper can't tell you apart.
Output
Your words, attached to the screen that was up when you said them:
## 00:34 · f11 — `frames/f11.jpg`
- [00:39] "this button is too small, I keep missing it"

## 00:52 · f13 — `frames/f13.jpg`
- [00:55] "and this error doesn't say what actually went wrong"
Plus the frames. A two-minute session is about 600 tokens.
Element context (optional)
Point talkthru at a UI hierarchy file and your agent gets element types, labels and stable test ids instead of guessing which component you meant from pixels:
talkthru process recording.mp4 --hierarchy hierarchy.json
## 00:34 · f11 — `frames/f11.jpg`
ui: button#checkout-submit "Place order" @24,680 342x48
- [00:39] "this button is too small, I keep missing it"
It is a timestamped sidecar your app writes — nothing here generates it, and the format is plain JSON with no iOS-specific assumption:
{ "snapshots": [
  { "tMs": 1200, "nodes": [
    { "type": "button", "testId": "checkout-submit", "label": "Place order",
      "rect": [24, 680, 342, 48], "depth": 4 }
  ] }
] }
Common alternate spellings (tag, id, text, bounds, elements, …) are
accepted as-is, so a DOM client can usually emit its natural shape. Malformed
files are ignored with a warning rather than failing the recording.
Full format: docs/hierarchy.md — fields, aliases, ranking rules, and how to write a client.
Network and console (optional)
Drop an events.json next to your recording and failed requests land under the
frame you were looking at:
## 00:34 · f11 — `frames/f11.jpg`
ui: button#checkout-submit "Place order" @24,680 342x48
net: POST https://api.example.com/checkout 500 340ms
- [00:39] "I tapped place order and nothing happened"
{ "events": [
  { "tMs": 12400, "kind": "network", "method": "POST",
    "url": "https://api.example.com/checkout", "status": 500, "durationMs": 340 },
  { "tMs": 12450, "kind": "console", "level": "error", "text": "TypeError: ..." }
] }
No headers, no bodies — auth tokens live in headers and the point of this
tool is that your data stays on your machine. Secret-looking query values are
replaced with REDACTED at parse time. Everything you send is stored; only
failures and error/warn reach the agent by default, because two minutes of
XHR is more text than the frames and narration combined.
Full format: docs/events.md
Windows
Win+Alt+R (Game Bar) records to Videos\Captures, which is where the watcher
looks by default — no name filter there, because that folder holds nothing else:
winget install -e --id Gyan.FFmpeg
npx talkthru watch
whisper.cpp has no winget package. Build it from
ggml-org/whisper.cpp and point
TALKTHRU_WHISPER at the binary.
Written and unit-tested for Windows, but not yet run on a Windows machine — I do not have one. If you try it, an issue either way is useful.
Commands
talkthru watch                  # watch ~/Downloads for screen recordings
talkthru watch ~/some-folder    # watch your own folder, any video
talkthru process video.mp4      # process one file
talkthru list                   # recent sessions
talkthru show latest            # print one
talkthru doctor                 # check the setup
talkthru compact                # reclaim disk: drops old originals, keeps every frame + transcript
talkthru prune                  # delete old sessions entirely
tt also works.
How it works
ffmpeg pulls the frames where your screen actually changed. whisper.cpp transcribes
your voice locally, split on the real silence between sentences, so each thing you said
lands on the screen you were looking at. An MCP server hands it to your agent.
Needs Node 20.11+.
Why
I built this because I test my own app on my phone every day and kept losing the feedback on the way back to my editor — screenshotting, cropping, trying to describe which screen I meant. Now I just record, talk, and Claude Code picks it up. Sharing it in case it saves you the same trip.
Installation
Source-derived launch command. Check the maintainer’s required arguments and credentials before running:
npx -y talkthru-mcpSet up in your AI client
Merge this template into ~/Library/Application Support/Claude/claude_desktop_config.json. Keep existing servers. Add any arguments, credentials, and permissions required by the maintainer; this template has not been install-tested.
{
  "mcpServers": {
    "io-github-edonzo-talkthru": {
      "command": "npx",
      "args": [
        "-y",
        "talkthru-mcp"
      ]
    }
  }
}
Restart Claude Desktop completely for changes to take effect. Confirm the server appears connected in the client’s tool list, then try a read-only example from its documentation.
Claude Desktop setup referencePackage
talkthru-mcpnpmCompatible MCP Clients
io.github.EdonZo/talkthru works with any MCP-compatible client. Copy the config snippet from the Configuration section above and add it to the file shown for your client, then restart the application.
- Claude Desktop
~/Library/Application Support/Claude/claude_desktop_config.jsonRestart Claude Desktop completely for changes to take effect. - Cursor
~/.cursor/mcp.jsonRestart Cursor for changes to take effect. - VS Code
.vscode/mcp.jsonReload VS Code window for changes to take effect. - Windsurf
~/.codeium/windsurf/mcp_config.jsonRestart Windsurf for changes to take effect. - Claude Code
.mcp.jsonSave at the project root, then start Claude Code in that project and review the MCP server approval prompt. Keep real credentials out of shared files.